 Let me introduce to you one of my favorite plugins for moving WordPress sites. I have tried a number of them out over the years, but so far my favorite one is “Snapshot” by WMPU. You can find the url here: https://premium.wpmudev.org/project/snapshot/ This plugin really makes it simple and easy to take an exact snapshot of everything on your WordPress site, and quickly move it to a new server. Let’s get started on this awesome plugin!
https://www.youtube.com/watch?v=CT5luGD6CXQ
First thing you’re going to want to do is obviously download the zip file from WMPU. For me I put all my premium WordPress plugins in one folder on an external hard drive, so it’s easy to find them. If you want you can be just like me and be cool.
Next, go to “Plugins” on your WordPress dashboard. Then click “Add New”. Then scroll over and click the “Upload” tab. Then you’re simply going to find the plugin called “Snapshot” and install that bad boy. Then make sure you activate it.

Once it’s installed and activated, you’re going to want to create a snapshot of all your settings on your site. To do this go to the “Snapshot” link on your dashboard and click “Add New”. One very important step is to make sure on “What files to archive” you click “Include common files”. This preserves your plugin settings, content, theme, etc. Then go all the way down to the bottom of the page and click “Create Snapshot”.

You will see a box pop up. Just hop in the shower (because you probably need one) or walk away from the computer while it takes a snapshot of everything.
Next, open up your new WordPress site that you want to install the content on. For the new site you’re going to have to install the “Snapshot” plugin on your new site. Make sure you click activate.

What I always do is login to my cPanel and go to “Legacy File Manager”. Your snapshot file will be in the Wp-content> uploads > snapshot. Then you’re going to go to the far right of cPanel and click on the url of the snapshot and copy and paste it into TextEdit or whatever text editor you’re using.

Then you’re going to login to your new site and click the “Import” text on under “Snapshot”. Here you will cut and paste your URL that you have copied to your text editor. Then click “Scan/Import Snapshot”.
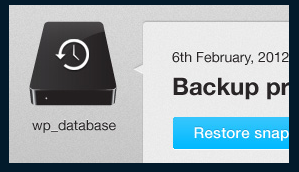
Then go to “All Snapshots” and click restore on the snapshot you want to restore. You will soon see the loading screen where it shows that everything is restoring. Wait until it completes and refresh your browser.
Congratulations your site is now moved and all your settings are preserved.
I always create a snapshot every month or so just in case all hell breaks loose and I have to revert to an earlier stage. You can easily go into your FTP and remove the snapshots that are 6,12,18 months old so you don’t chew up all your disk space on your server.
Again, if you are looking for the Snapshot plugin you can find it here by clicking on the link. Please let me know if you have any questions about the plugin.
Great post. this is really helpful info… why can’t other sites explain this as you have?
Very clear cut instructions on using Snapshot. Thank you for the outline. Many people don’t know the importance of a good plug in to move your site when it is necessary. It is a real pain if you have to reset all of your settings and worry about all of that. It can take ages. I have done it one time and it took me over a month until I was happy with my site again.
Thank you once again on the great walk through for Snapshot. I will definitely give it a try on my next move.